In summary:
- Finishing a 100-mile sportive strong isn’t about luck; it’s about executing pre-planned systems for fuelling, pacing, and logistics.
- Proactive fuelling, starting with the first hour, is non-negotiable. Aim for 60-90g of carbs per hour and train your gut to handle it.
- A negative split pacing strategy, where you deliberately start slower than you feel you can, is the single biggest key to avoiding late-race collapse.
- Your mental game and logistical preparation are just as important as your physical training. Control the controllables to eliminate stress.
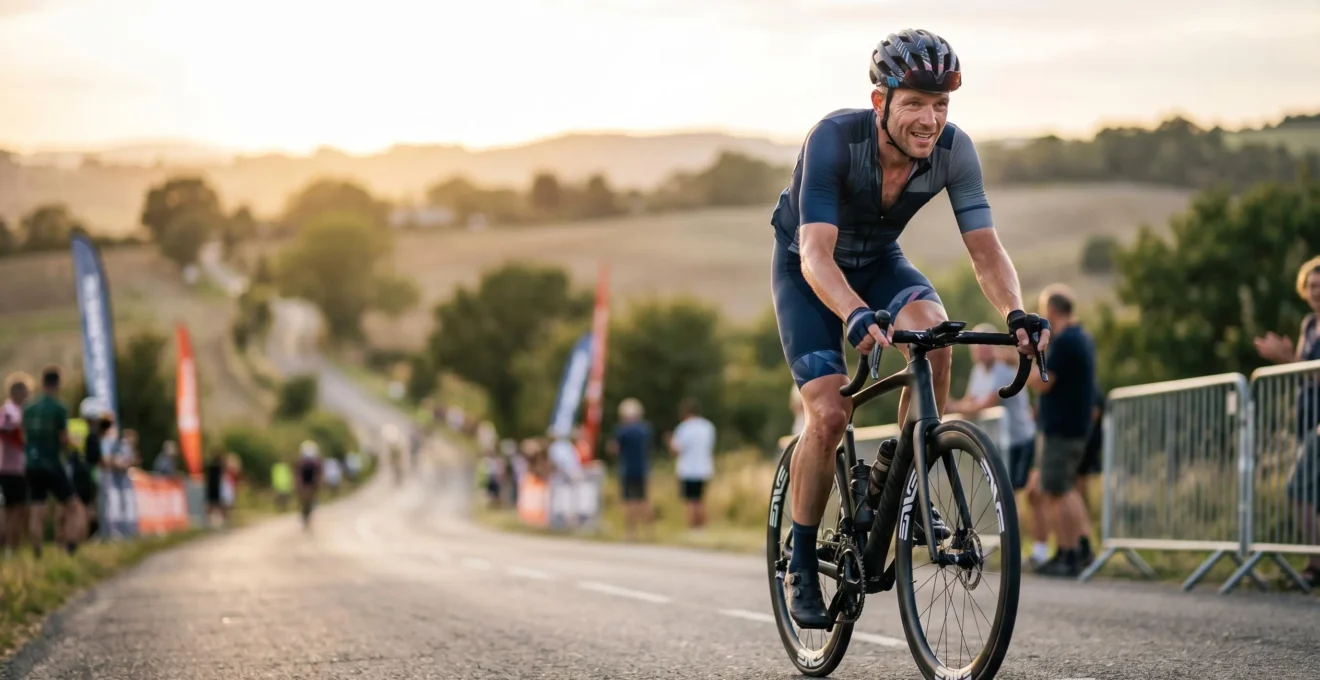
The fear is specific. It’s not about the start line, buzzing with nervous energy. It’s the quiet dread of mile 70. You’ve been riding for hours, the initial excitement has faded, and a cold calculation begins: « I still have 30 miles to go, and I feel empty. » This is the shadow of ‘the wall,’ or ‘bonking,’ and for anyone tackling their first 100-mile sportive, it’s the primary antagonist. You’ve heard the standard advice: « ride more, » « eat and drink, » « pace yourself. » While true, this is like telling a novice sailor to « use the wind. » It’s advice, but it’s not a strategy.
This guide is different. As an endurance coach, I see the same pattern: riders with enough physical fitness to complete the distance fail because they lack robust, non-negotiable systems. They rely on hope and feeling, which are the first casualties in a long day out. Success in events like the RideLondon-Essex 100 or the notoriously hilly Dragon Ride isn’t found in brute force. It’s found in disciplined execution of a plan. The key isn’t just to avoid hitting the wall; it’s to systematically dismantle it brick by brick, starting from the first pedal stroke.
We’re going to move beyond the platitudes. Instead of « eat, » we’ll define a precise hourly fuelling protocol. Instead of « pace yourself, » we’ll build an energy conservation model. We will break down the challenge into eight manageable systems, covering everything from carbohydrate intake and pacing psychology to logistical packing and immediate post-ride recovery. This is your blueprint for turning fear into a finish line photo you’re smiling in.
This article provides a complete framework for your event. The following summary breaks down the key systems you’ll need to master to conquer your first century ride with confidence.
Summary: How to Finish Your First 100-Mile Sportive Without hitting the Wall?
- Eating on the Bike: How Many Grams of Carbs Do You Really Need Per Hour?
- Negative Splits: How to Save Energy for the Final 20 Miles of a Sportive?
- The Dark Place: Mental Tricks to Keep Pedaling When Your Legs Scream Stop
- Dressing for a 6-Hour Ride: How to Handle Four Seasons in One Day?
- Walking Down Stairs Tomorrow: The Immediate Recovery Routine After a Century Ride
- The ‘Just in Case’ Bag: What to Pack for the Start Line vs. the Hotel?
- Screen Off: How to Make Your GPS Last for a 12-Hour Audax?
- How to Survive Your First UK Sportive: A Logistics Guide for the Fred Whitton or Dragon Ride
Eating on the Bike: How Many Grams of Carbs Do You Really Need Per Hour?
The single biggest reason cyclists « bonk » is running out of fuel. Your body’s glycogen stores are finite, and on a 100-mile ride, you will deplete them. The only solution is to start refuelling early and consistently. Forget eating when you feel hungry; by then, it’s too late. You need a proactive fuelling system. For decades, the standard advice was 30-60 grams of carbohydrates per hour. However, the science has moved on. Modern sports nutrition shows that with training, the gut can absorb much more, dramatically improving performance and preventing the wall.
The goal is to move from a passive eater to a strategic fueller. Elite athletes have shown what’s possible; some Tour de France riders consume up to 120 grams of carbohydrates per hour to sustain their incredible efforts. While you’re not riding in the Tour, the principle is the same: more fuel equals better performance. For a sportive rider, a realistic and highly effective target is between 60 and 90 grams per hour. This requires practice. You must train your gut just like you train your legs. Start using your chosen gels, bars, and drinks on long training rides to see what works and to help your body adapt to processing this quantity of fuel while exercising.
Here is a simple protocol to build up your tolerance:
- Weeks 1-2: Start with a comfortable 40g of carbs per hour on your longer training rides.
- Weeks 3-4: Gradually increase your intake to 60g per hour. Monitor how you feel.
- Weeks 5-6: Push towards 90g per hour on your longest rides. This should feel like a lot, but it will pay dividends.
- Final Test: Use your final long ride to simulate your event-day nutrition plan exactly. This is your dress rehearsal.
Negative Splits: How to Save Energy for the Final 20 Miles of a Sportive?
Adrenaline is a liar. At the start of a big sportive, surrounded by hundreds of other riders, it’s incredibly easy to get carried away and ride too hard. This is the most common and costly mistake an endurance cyclist can make. The key to finishing strong is not raw power, but intelligent energy management. This is the art of the « negative split, » where you ride the second half of the event faster or at a more consistent effort than the first. To do this, you must consciously hold back at the beginning, even when you feel fantastic.
Think of your energy as a bank account. You start with a finite amount, and every hard effort is a significant withdrawal. The first half of the ride is for minimal, conservative withdrawals. This feels counter-intuitive, but the science is clear. For example, a 2001 study on cycling performance found that riders who deliberately held back to 15% below their self-selected pace for the first few minutes of a time trial ended up with a faster overall time. You are preserving precious glycogen stores and saving your muscular resilience for the final, challenging miles. Ignore the riders sprinting off the line; you will almost certainly see them again later, and you’ll be the one pedalling past them.
This image perfectly illustrates the concept. You want to be the full bottle at mile 70, not the empty one. Control your effort with a heart rate monitor or power meter, keeping your numbers firmly in your endurance zone (Zone 2) for the first 40-50 miles. Resist the urge to push on hills. Stay in your seat, spin a lower gear, and think of it as depositing energy for later.
As the illustration suggests, a conservative start leads to a stronger finish. This disciplined patience is what separates those who simply survive from those who conquer the distance. The final 20 miles will be a test, but with a well-managed energy account, it will be a test you are fully prepared to pass.
The Dark Place: Mental Tricks to Keep Pedaling When Your Legs Scream Stop
At some point during a 100-mile ride, it will get hard. Not just physically challenging, but mentally punishing. Your legs will burn, your back will ache, and a small voice in your head will start asking, « Why are you doing this? You could just stop. » This is the « dark place, » and your ability to manage it is as critical as your physical fitness. The good news is that mental resilience is a trainable skill, and research shows it has a significant impact. For instance, studies have demonstrated that athletes with higher mental resilience performed up to 20% better in competitions.
The secret is not to avoid the discomfort but to have a pre-planned toolkit of mental strategies to deploy when it arrives. Panicking or letting negative thoughts spiral is a recipe for disaster. Instead, you must calmly acknowledge the feeling and execute a mental drill. This is about breaking an overwhelming challenge into a series of tiny, manageable victories. The goal is no longer « finish the 100 miles, » it’s « pedal to that next tree » or « count 20 more pedal strokes. »
Here are five powerful mental tricks to have ready in your back pocket:
- Chunking: Break the ride down. Don’t think about the finish line. Focus only on getting to the next feed station, the top of the next hill, or even the next kilometre marker.
- Positive Self-Talk: Reframe the pain. Instead of « my legs are screaming, » tell yourself « this feeling is my body getting stronger. » Actively replace negative thoughts with pre-rehearsed positive affirmations.
- Mindfulness & Breathing: When you feel fatigue or panic setting in, bring your focus to your breath. Inhale for four counts, exhale for six. This simple act can lower your heart rate and bring a sense of control.
- Shift Your Focus: Alternate between an internal focus (your pedal stroke, your breathing) and an external one. Look at the scenery, thank a marshal, or encourage another rider. This provides a mental break from the sensation of effort.
- Celebrate Small Wins: Crested a tough climb? Successfully ate a gel on schedule? Acknowledge it. Give yourself a mental pat on the back. These small doses of positivity accumulate and keep motivation high.
Dressing for a 6-Hour Ride: How to Handle Four Seasons in One Day?
In the UK, there’s no such thing as a guaranteed weather forecast. A 100-mile sportive can easily start in cool morning mist, bake under a midday sun, face a blustery headwind, and finish in a sudden downpour. Being improperly dressed is not just uncomfortable; it’s a direct drain on your precious energy reserves. Shivering from cold or overheating from being overdressed wastes calories that should be going to your pedals. Your clothing is not a fashion statement; it’s a personal climate control system that must be managed strategically.
The golden rule is layering with versatile, easily adjustable pieces. Forget your thick winter jacket. Your best friends are a gilet, arm warmers, and a packable rain cape. The goal is to be able to make micro-adjustments to your insulation and wind/water protection without having to stop for a full wardrobe change. You should start the ride feeling slightly cool, as you will warm up within the first 15-20 minutes. A common mistake is to dress for the temperature at the start line and then be overheating by the first climb.
Your layering system for a typical UK sportive should look like this:
- Base Layer: A high-quality, moisture-wicking base layer is non-negotiable. It pulls sweat away from your skin, keeping you dry and regulating your core temperature whether it’s hot or cold.
- Mid-layer/Gilet: A lightweight, windproof gilet is the most versatile piece of cycling kit. It protects your core on descents or when the wind picks up but is small enough to stuff into a jersey pocket.
- Arm Warmers: Essential for cool starts. As the day warms up, they can be rolled down to your wrists or removed completely without stopping.
- Rain Cape: A modern, lightweight rain cape can be a lifesaver. It should be tightly folded and live in your middle jersey pocket, ready for emergencies.
- Gloves: Your hands are vulnerable. Cold, wet hands make braking and changing gear difficult and unsafe. Consider carrying a lightweight pair of waterproof gloves if rain is a possibility.
Finally, apply the « 5-minute rule »: after making a change (like taking off a gilet), give your body five minutes to adapt before deciding if you need to adjust again. This prevents a constant cycle of stopping and starting.
Walking Down Stairs Tomorrow: The Immediate Recovery Routine After a Century Ride
You’ve crossed the finish line. The overwhelming feeling is relief, but the clock has just started on your recovery. What you do in the first 30-60 minutes after a 100-mile effort has a disproportionate impact on how you will feel tomorrow—and whether you can walk down stairs without wincing. Delayed Onset Muscle Soreness (DOMS) is the enemy, and a structured, immediate recovery protocol is your best defence. Don’t just collapse in a heap; your body is primed to absorb nutrients and begin the repair process. This is the « golden hour » for recovery.
The first priority is to resist the urge to stop moving completely. A gentle « active recovery » helps your circulatory system clear metabolic waste products like lactic acid from your muscles. The second priority is to get fuel back in. Your muscles are like sponges, ready to soak up carbohydrates and protein to replenish their depleted glycogen stores and start repairing micro-tears. A recovery drink or a simple snack like a banana and a protein shake is ideal. Do not wait until you get back to the hotel or car; have it ready at the finish.
This simple protocol, executed within the first hour, will dramatically accelerate your recovery:
- Minutes 0-5: Keep walking. After you get your medal, don’t just stop. Walk around gently to prevent blood from pooling in your legs and to help your heart rate come down gradually.
- Minutes 5-15: Consume your recovery fuel. A drink with a 3:1 or 4:1 ratio of carbohydrates to protein is optimal for kick-starting glycogen replenishment.
- Minutes 15-30: Perform some very light, dynamic stretching. Focus on major muscle groups like quads, hamstrings, and glutes. Avoid deep, static stretching, as your muscles are too vulnerable.
- Within 60 minutes: If possible, change into dry clothes, put on compression socks, and elevate your legs for 15-20 minutes. This helps reduce inflammation and swelling.
The next day, a short, gentle 20-30 minute spin on the bike or a brisk walk will be far more effective at reducing soreness than complete rest. It promotes blood flow and helps flush out any lingering stiffness.
The ‘Just in Case’ Bag: What to Pack for the Start Line vs. the Hotel?
Logistical stress is a needless drain on your mental and physical energy before a big event. Fumbling for a safety pin or realising you’ve left your floor pump in the car creates a spike of cortisol you simply don’t need. The solution is to think like a pro and adopt a three-tier packing system. This separates what you need on the bike, what you need at the start line (but not during the ride), and what can safely wait for you back at the hotel or car. This system ensures you have everything you need, exactly when you need it, eliminating last-minute panic.
The goal is to control the controllables. You can’t control the weather or a steep gradient, but you can absolutely control your preparation. Having a dedicated ‘start line bag’ for the bag drop is a game-changer. This small bag contains items for the potentially long wait in the starting pen and for immediately after you finish, allowing you to travel light to the start while being fully prepared.
Here’s how to structure your three-tier packing system:
- Tier 1: On-Bike Essentials (in jersey pockets/saddle bag): This is your ride-critical kit. It includes your multi-tool, a spare inner tube (or two), tyre levers, CO2 cartridges and inflator, a mini-pump as a backup, and all your planned on-bike nutrition and electrolyte mix.
- Tier 2: Start Line Bag (for the event bag drop): This bag handles the pre- and post-ride. It should contain a floor pump for final tyre pressure checks, any extra layers you’ll shed just before starting, pre-ride nutrition (like a banana), and most importantly, a full set of dry, warm clothes and comfortable shoes (like flip-flops) for after you finish.
- Tier 3: Hotel/Car Bag (The Base Camp): This holds everything else. Your main luggage, spare gear in case of a last-minute issue (e.g., spare shorts), a full recovery kit, your phone charger, and your favourite post-ride recovery snack that wasn’t practical for the bag drop.
Within this system, consider a « Mechanical Catastrophe Kit » in your car bag (spare derailleur hanger, tyre boot, quick-link) and, most importantly, what I call a Psychological Safety Item—a small, comforting non-essential like your favourite post-ride treat or a book for the journey home. It’s a small reward that helps frame the event positively.
Screen Off: How to Make Your GPS Last for a 12-Hour Audax?
In the modern era of cycling, a dead GPS unit is the equivalent of being lost at sea without a compass. For a 100-mile sportive, which can take anywhere from 5 to 10 hours, battery life is a legitimate concern. The sinking feeling of seeing a « Low Battery » warning at mile 75 can be a major psychological blow. Relying on the default settings of your Garmin or Wahoo is a recipe for anxiety. Instead, you need a proactive battery optimization strategy to ensure your navigation and data recording last the entire day.
The key is to disable every non-essential function. Your GPS is a mini-computer with a powerful antenna, a bright screen, and multiple wireless radios (Bluetooth, Wi-Fi, ANT+). Each of these is a drain on the battery. Before the event, you should go through your device settings and create a custom « Endurance » or « Sportive » activity profile with battery-saving settings enabled. The single biggest power drain is the screen backlight. Set it to the lowest possible brightness and have it turn off after 10-15 seconds. You don’t need it on constantly; you only need to see it when approaching a turn.
Here is a checklist for maximizing your GPS battery life:
- Create an ‘Endurance’ Profile: Disable Bluetooth, Wi-Fi, and any smartphone notifications. Only connect the sensors you absolutely need (heart rate, power meter).
- Enable Screen-Off Mode: Set the display to sleep automatically. A quick button press will wake it when needed.
- Reduce Screen Brightness: Turn the backlight down to the minimum level you can tolerate.
- The Power Bank Strategy: For very long rides, carry a tiny « lipstick-sized » portable power bank. A quick 15-minute boost at a feed stop can add 3-4 hours of battery life.
- The Analog Backup: Technology can and does fail. A simple, waterproofed cue sheet with key turns and feed station distances taped to your top tube is an invaluable, zero-fail backup.
As the saying goes, « two is one, and one is none. » Combining a battery-optimized GPS with a simple analog backup like the one shown above completely removes navigation anxiety, freeing up your mental energy to focus on pedalling and fuelling.
Key takeaways
- Fuel Proactively: Your fuelling plan is not a suggestion. Execute it precisely, aiming for 60-90g of carbs per hour, starting from hour one. Train your gut to handle this intake.
- Pace Conservatively: Win your race in the second half. Deliberately start slower than you feel capable of, managing your energy as your most precious resource. A negative split is the goal.
- Control the Controllables: You can’t control the hills, but you can control your gear, your logistics, and your mindset. A solid plan for packing, clothing, and mental strategy eliminates unnecessary stress.
How to Survive Your First UK Sportive: A Logistics Guide for the Fred Whitton or Dragon Ride
You’ve done the training. You have the systems. Now it’s time to apply them to the unique context of a major UK sportive. Events like the Fred Whitton Challenge, with its infamous 30% gradients, or the Dragon Ride, with its relentless Welsh climbs, are more than just long rides; they are logistical and strategic puzzles. Simply showing up is not enough. You must understand the specific demands of the event and tailor your approach accordingly. This is the final layer of preparation, where you synthesize all your training into a coherent event-day plan.
Case Study: The Power of Progressive Preparation
A perfect example of this structured approach in action comes from a rider preparing for their first 100-mile ride with over 6,000 feet of climbing. Starting with just a 4-month-old casual riding base, they followed a 12-week plan. The plan didn’t involve huge, demoralizing jumps in mileage. Instead, it built gradually from 28-mile rides to 45 miles by week 6, and peaked with an 83-mile ride the week before the event. By combining this sensible mileage progression with a disciplined fuelling strategy on every long ride, the rider completed the full 100-mile event feeling confident and strong, not depleted. It’s a powerful demonstration that a gradual, systematic approach is far more effective than last-minute cramming.
This final preparation phase is about specific reconnaissance and planning. It’s about knowing what kind of challenge you’re facing and ensuring your equipment and strategy are a perfect match. A flat, windy sportive in the Fens requires a different mindset and gearing than a mountain epic in the Lake District.
Your Pre-Event Logistics Audit
- Research Feed Stations: Don’t take the organiser’s word for it. Check past event reviews. Are the feed stations well-stocked or chaotic? Knowing this dictates how self-sufficient you need to be with your own nutrition.
- Check Your Gearing: Be honest about your climbing ability. For a brutally steep event like the Fred Whitton, there is no shame in fitting a smaller chainring (sub-compact) or a larger cassette (e.g., a 32-tooth). This is an energy conservation strategy, not a sign of weakness.
- Create a Bail-Out Plan: This is for mental confidence more than anything. Before the event, look at the route map and identify potential « escape routes » via public transport or local taxi services. Knowing you have a plan B eliminates the fear of being stranded.
- Decode the Event Archetype: Is this an ‘Alpine Climber’ event (long, steady climbs), a ‘Punishing Roller’ (short, sharp, repeated hills), or ‘Flat & Windy’? Each requires a different training focus and pacing strategy.
- Finalise Your Nutrition Plan: You must test your exact event-day fuelling strategy during your final long training rides. Never, ever try a new gel, bar, or drink for the first time on race day.
Stop fearing the distance and start building your systems. Your successful 100-mile finish is not a matter of chance; it’s the direct result of the strategic, disciplined work you do today. Now, go and earn that finish line smile.