In summary:
- Success in a monster sportive is 80% logistics and 20% legs; master the ‘unseen race’ before the start line.
- Book accommodation the moment you get your entry; a bad night’s sleep is the first ‘logistical bonk’.
- Systematise your packing into three zones: what you carry, what’s in the car, and what stays at the hotel.
- Never rely solely on feed stations. Test all your nutrition in training to avoid race-day stomach issues.
- The ride isn’t over at the finish line. Plan your post-ride recovery and travel to avoid a dangerous, exhausted drive home.
So, you’ve done it. You’ve clicked ‘enter’ on the Fred Whitton Challenge or the Dragon Ride. A wave of excitement washes over you, quickly followed by a cold tide of pure, unadulterated fear. The ride profiles look like an ECG of a heart attack. The mileage is monumental. Your mind is already a whirlwind of questions: Have I got the right gears? What if I get a flat? What if I bonk after 20 miles? Everyone will tell you to « train hard » and « get the miles in, » and they’re not wrong. But that’s the obvious part. I’m here to tell you, as someone who has made every mistake in the book, that physical fitness is only a small part of the battle.
The real challenge, the one that trips up most first-timers, is what I call the ‘unseen race’ of logistics. It’s a war fought weeks, even months, before the event. It’s about securing a B&B that does a 5 am breakfast, knowing exactly what to grab at a chaotic feed station, and figuring out how not to fall asleep at the wheel on the M6 on the way home. Getting the logistics wrong leads to a « logistical bonk »—a catastrophic failure of planning that can end your day before your legs even have a chance to give out. This guide isn’t about training plans; it’s the unvarnished, hard-won wisdom you need to conquer the logistics, so all you have to worry about on the day is turning the pedals.
This article breaks down the essential logistical pillars you need to master. From choosing the right type of challenge to the crucial post-ride strategy, we will cover the practical, real-world advice that will get you to the finish line in one piece.
Summary: A Logistics Guide for Your First Major UK Sportive
- Hills or Flat? Choosing a Sportive That Won’t Break Your Spirit
- Booking Early: Why You Should Secure Your Bed 6 Months Before the Event?
- The ‘Just in Case’ Bag: What to Pack for the Start Line vs. the Hotel?
- Gels or Flapjack: What Should You Grab at the Feed Station to Avoid Stomach Cramps?
- Driving Home: How to Stay Awake After 7 Hours in the Saddle?
- Negative Splits: How to Save Energy for the Final 20 Miles of a Sportive?
- Reading the Spikes: How to Spot a 20% Gradient Before You Are Halfway Up It
- How to Finish Your First 100-Mile Sportive Without hitting the Wall?
Hills or Flat? Choosing a Sportive That Won’t Break Your Spirit
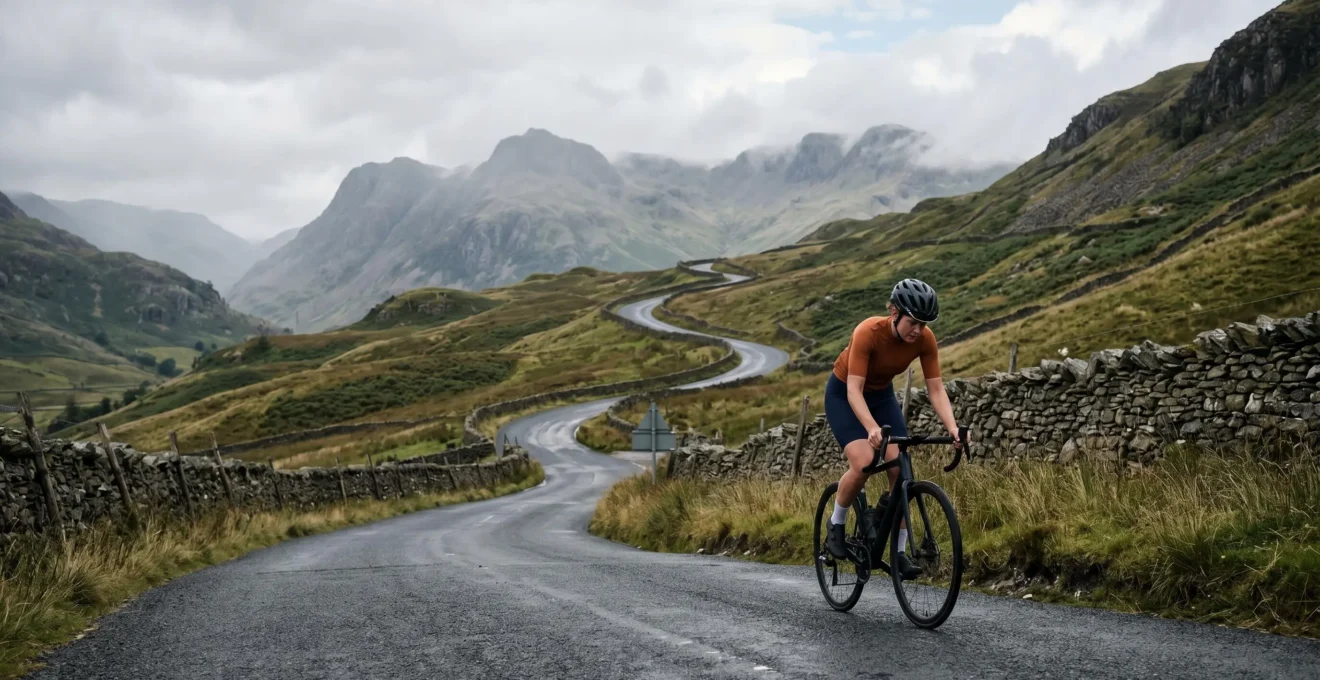
Let’s get one thing straight about UK sportives, especially the iconic ones: ‘flat’ doesn’t really exist. The first logistical decision you make is not about avoiding hills, but about choosing your type of suffering. Are you better suited to long, grinding mountain passes or a route with a « saw-tooth » profile—a relentless series of short, brutally steep ramps? Understanding this is critical. A saw-tooth route is often more psychologically draining, as it offers no rhythm and no real recovery. As the Fred Whitton Challenge perfectly illustrates, the difficulty lies in its sequence of climbs, where the steepest gradients hit you when you are already fatigued. This is a bucket-list event that demands respect, not just a casual attempt.
Before you even commit your entry fee, you need to become an amateur detective. Your job is to investigate the event’s logistical footprint. Is parking a nightmare? Are the feed stations notoriously sparse? These factors will have a far greater impact on your day than an extra 500 feet of climbing. A crowded event with 3,000 other riders means queues at the start, queues for the toilet, and queues at the feed stations. A smaller, local event might offer a more relaxed experience for a first-timer. You must assess the entire operational challenge, not just the elevation profile on a GPS file. Your first victory is choosing a battle you’re logistically prepared to fight.
Your Pre-Entry Sportive Audit: Key Logistics to Investigate
- Route Profile Analysis: Look beyond total elevation. Analyse the chart for a ‘saw-tooth’ pattern (multiple sharp climbs) versus long, steady ascents to understand the mental toll.
- Access & Parking: Check the event website for guaranteed parking availability and read past participants’ reviews on start-line queuing times.
- Feed Station Quality: Verify the number of feed stations (aim for a minimum of 3 for a 100-mile ride) and check the listed nutrition sponsors. Are they brands you’ve used before?
- Accommodation Scarcity: Six months out, search for hotels/B&Bs within a 20-mile radius. If everything is already booked, you know it’s a high-pressure area.
- Cut-off Times: Identify the official checkpoint cut-off times. The Fred Whitton, for example, has a strict cut-off at Braithwaite, which dictates your early pacing strategy.
Booking Early: Why You Should Secure Your Bed 6 Months Before the Event?
Here’s a classic rookie error: you secure your event entry, breathe a sigh of relief, and think « I’ll sort accommodation later. » Big mistake. For events like the Fred Whitton or Dragon Ride, which are hosted in rural national parks, the local infrastructure is tiny. Hotels, B&Bs, and Airbnbs are booked up within hours of the ballot results being announced. Waiting means you’ll either be staying 40 miles away or paying an astronomical price for a spare room. This isn’t just about convenience; it’s about performance. A 90-minute drive on winding country lanes at 5 am on event day is a recipe for stress, missed start times, and a « logistical bonk » before you even clip in.
As Yellow Jersey UK notes in their guide, for an iconic UK sportive, the challenge is relentless from the start. They state, « There is no short or easy option for the Fred Whitton. The ride is ‘only’ 112 miles but covers a relentless series of climbs around the Lake District National Park. » This unforgiving nature extends to the logistics. Your accommodation is your base camp. It needs to support your mission. You need secure bike storage, not a flimsy shed. You need a host who understands that you require breakfast at an ungodly hour or access to a kitchen. You need to be close enough to the start to have a calm, methodical morning routine. Booking six months in advance isn’t being overly cautious; it’s the first and most critical move in your logistical strategy. I have seen more riders’ days ruined by a stressful morning than by any climb.
When booking, your checklist should prioritise function over luxury. Is there a ground-floor room or a locked garage for your expensive machine? Does the B&B owner baulk when you ask about a 5:30 am porridge request? Is there a decent-sized bath for a post-ride soak to ease your screaming muscles? And here’s a pro tip: book the room for the night after the event too. The thought of a long, dangerous drive home when you’re utterly broken is a terrible one. Finishing the ride, having a shower, a proper meal, and falling into bed is the ultimate reward and the safest option.
The ‘Just in Case’ Bag: What to Pack for the Start Line vs. the Hotel?
Panic-packing is a symptom of a disorganised mind. You arrive at the event with a car full of everything you own, yet you still can’t find your helmet. The veteran’s approach is to think of your gear in three distinct zones: The Bike, The Car, and The Hotel. This « Triage Centre » system ensures you have what you need, where you need it, without carrying unnecessary weight or creating pre-race chaos. What’s on the bike is for ride-ending emergencies only: two spare tubes, a multi-tool with a chain breaker, tyre levers, and a mini-pump. That’s it. You are not a rolling workshop.
What’s in the car (or your start-line bag) is for pre-ride comfort and post-ride survival. This includes your track pump for getting tyres to the perfect pressure, a change of clothes for after the event, a towel, wet wipes, and that all-important recovery drink and snack for the moment you collapse back into the driver’s seat. It also holds your ‘just in case’ cycling kit: a warmer gilet, waterproof gloves, or a skull cap. You make the final decision on what to wear 15 minutes before you start, based on the real-time weather, not a forecast from three days ago.
This organised system allows you to adapt. If it’s colder than expected, you grab the extra layer from the car. If it’s warmer, you leave it. This preparation prevents the critical error of being over-dressed and boiling on the first climb or under-dressed and freezing on the first descent. The hotel is for your main luggage and everything else you don’t need until after you’ve showered and recovered.
As the image shows, your post-ride recovery station should be as meticulously planned as your on-bike nutrition. A foam roller, protein shake, and clean, dry clothes are not luxuries; they are essential tools for managing the physiological crash that follows a huge endurance effort. By compartmentalising your gear, you replace chaos with calm control, which is the mindset you need at the start of a 100-mile battle.
Gels or Flapjack: What Should You Grab at the Feed Station to Avoid Stomach Cramps?
Here it is: the most common way first-timers bonk. They fail their nutrition strategy. They either don’t eat enough, eat the wrong things, or, most dangerously, play « Feed Station Roulette. » This is the game of relying on whatever the event provides, without ever having tried it before. A new brand of energy gel can feel like a gut punch an hour after you’ve taken it. A well-meaning but dry flapjack can be impossible to chew and swallow when you’re breathing hard up a 15% gradient. As the experts at HIGH5 Sports Nutrition state, « Carbohydrate is your high-energy fuel for endurance events. Unfortunately, you only have a limited amount stored in your body and it’s depleted after less than two hours of cycling. » Your job is to constantly top up that tank with fuel your body knows and trusts.
The golden rule is simple: never try anything new on race day. Your long training rides are your laboratory. Use them to experiment with gels, bars, rice cakes, and drinks to find out what gives you energy without causing stomach cramps. You should start the event with enough of your own trusted supplies for at least the first three hours. The feed stations then become a bonus—a chance to grab a banana or top up your bottles—not your primary fuel source. For a final kick, consider caffeine. Research shows that a dose of around 3mg of caffeine per kg of bodyweight, taken towards the end of the ride, can significantly boost performance.
Furthermore, you cannot always trust what is on the label. A startling piece of research highlighted this risk. A study in the *International Journal of Sport Nutrition and Exercise Metabolism* found a systematic bias towards less energy and carbohydrates in gels compared to their labels. According to the analysis, some brands fell dramatically short of their claimed energy content, forcing the body to compensate by tapping into glycogen stores much earlier than the rider would expect. This is a fast track to the bonk. Relying on your own, tested nutrition isn’t just a preference; it’s a critical component of risk management.
Driving Home: How to Stay Awake After 7 Hours in the Saddle?
You’ve crossed the finish line. You have your medal. You feel a mix of elation and complete, bone-deep exhaustion. Many riders think the challenge is over. This is a dangerous illusion. The drive home is arguably the most hazardous part of your entire day. You are dehydrated, glycogen-depleted, and mentally shattered. Your reaction times are shot. Getting behind the wheel in this state is as dangerous as drink-driving. I have had to pull over into a service station and sleep for an hour because I started seeing things on the motorway. I am not exaggerating.
This isn’t just feeling a bit tired; it’s a full-body « Physiological Crash. » Scientific research confirms the severity of this state. As one study on prolonged cycling notes, intense endurance exercise creates « multisystemic disruption… altering metabolic stress, including acidosis, thermal load, and oxygen availability with impaired physical/perceptive performance and neuromuscular efficiency. » In simple terms, your body and brain are not functioning properly. You are not fit to operate heavy machinery.
The only real solution is to avoid it. This is why booking accommodation for the night after the event is my number one tip for first-timers. It removes the pressure and the danger. If you absolutely must drive, you need a non-negotiable post-ride protocol. Do not even think about getting in the car for at least 90 minutes. In that time, you must:
- Drink a full-sized recovery shake (protein and carbs).
- Eat a proper, savoury meal. A sausage roll, a pasty, anything with salt and substance.
- Drink at least a litre of water or electrolyte drink.
- If possible, have a 20-minute power nap.
Caffeine can help, but it’s a temporary mask for a deep physiological need for rest. Do not risk your life, or someone else’s, for the sake of getting home a few hours earlier.
Negative Splits: How to Save Energy for the Final 20 Miles of a Sportive?
Adrenaline is your worst enemy in the first two hours of a sportive. You’re surrounded by hundreds of other riders, the atmosphere is electric, and it’s incredibly easy to get swept along at a pace that is 20 watts higher than you can sustain. This is the single biggest pacing mistake and the reason so many people are crawling by the final 20 miles. The antidote is a concept borrowed from running: the negative split. The goal is to ride the second half of the event slightly faster than the first half. It sounds simple, but it is an act of supreme self-discipline. Research shows just how difficult it is; a 2013 study found that only 5.6% of runners successfully achieve negative splits in a marathon.
Why is it so effective? As research from Rehook Cycling explains, « Cyclists who use negative split pacing are able to complete their rides in less time than cyclists who use a steady pace, while also expending less energy in the process. » By starting conservatively, you are primarily using your aerobic system and preserving your precious glycogen stores. You let the adrenaline junkies fly off the front, knowing you will likely see them again, struggling, in the latter stages. You have to ride your own ride, guided by your heart rate monitor or power meter, and completely ignore the people streaming past you.
In a lumpy sportive like the Fred Whitton, a true negative split is hard to achieve, but the principle remains the same. Be deliberately conservative on the first few major climbs. Hold back. Eat and drink. The goal is to arrive at the halfway point feeling like you’ve barely started. This is your secret weapon. While others are starting to fade, you will feel relatively fresh, able to maintain a strong pace and attack the final, killer climbs with determination instead of dread. It requires courage to let people go, but your reward will be a strong finish while others are walking.
Reading the Spikes: How to Spot a 20% Gradient Before You Are Halfway Up It
On an epic UK sportive, the climbs are the main characters of the day. They have names, reputations, and the ability to break you physically and mentally. The mistake many riders make is to look at their bike computer only when it’s too late—when their legs are screaming, their heart rate is maxed out, and they’ve run out of gears. The veteran rider learns to read the road ahead, spotting the warning signs of a severe gradient spike before they are in the thick of it. You need to look up and anticipate. Does the road seem to disappear into the sky? Are the dry-stone walls on either side suddenly angling up sharply? Are the trees on the horizon far above you? These are the visual cues that a wall is coming.
Your bike computer is your second line of defence. Don’t just look at the current gradient; look at the elevation profile screen for the climb. This shows you the « spikes »—the red sections that indicate gradients of 20% or more. Seeing a spike coming up gives you a precious 30-second window to prepare. You should use this time to shift into your lowest gear *before* the gradient bites, take a drink, and mentally prepare for the effort. Hitting a 25% wall in the wrong gear is a recipe for a snapped chain or a humiliating track-stand followed by a slow-motion topple. These climbs demand respect, especially late in the day. On the Fred Whitton route, for example, the infamous Hardknott Pass hits you with a savage 30% gradient at 94 miles into the ride, when you are already deeply fatigued.
This is also where your equipment choices, made months earlier, come into play. Do you have a « bail-out » gear? For a sportive in the Lake District or Wales, a compact (50/34) or sub-compact chainset paired with a wide-range cassette (e.g., 11-32 or 11-34) is not a sign of weakness; it’s a sign of intelligence. It’s the tool that allows you to keep pedalling, however slowly, up those brutal pitches, conserving energy and saving your legs for the long day ahead.
Key Takeaways
- Logistical failure, or a ‘logistical bonk’, is a more common reason for not finishing than physical failure.
- Your nutrition strategy must be tested and proven in training. Never rely on unknown products from feed stations.
- Pacing is about disciplined energy conservation in the first half to ensure you have strength for the second.
How to Finish Your First 100-Mile Sportive Without hitting the Wall?
So, how do you put it all together to avoid « hitting the wall, » or the dreaded bonk? It’s the culmination of every logistical decision we’ve discussed. Hitting the wall is rarely a sudden event; it’s the result of a thousand small errors in the preceding hours. It’s the energy you wasted going too hard in the first hour. It’s the gel you skipped because you « didn’t feel like it. » It’s the dehydration that has been slowly creeping up on you. Finishing a ride like this, where top riders complete in just under 6 hours but 11+ hours are common for average riders, is about methodical execution, not heroics.
The first hour is the most critical period for preventing a bonk five hours later. This is where you lay your nutritional foundation. You must force yourself to eat and drink on a schedule, even if you don’t feel thirsty or hungry. A good rule of thumb is to consume 60-90g of carbohydrates and 500-750ml of fluid every hour, starting from the very first hour. This means taking your first gel or half an energy bar at around the 45-minute mark, and sipping from your bottle every 15 minutes. It feels unnatural to eat so early, but you are not eating for that moment; you are fuelling the fourth, fifth, and sixth hours of the ride.
As Canadian Cycling Magazine highlights, the reliability of that fuel is paramount: « When gels don’t deliver the promised carbohydrate content, your body is forced to compensate by tapping into glycogen stores earlier than expected. » This reinforces the need to use your own, trusted supplies. Ultimately, finishing your first 100-mile monster is a victory of process over passion. It’s about respecting the distance, trusting your logistical plan, and executing your nutrition and pacing strategy with the dispassionate precision of a pilot running through a pre-flight checklist. Do that, and your legs will have a fighting chance to carry you over the line.
Now that you have the logistical blueprint, the next step is to apply this methodical approach to your training and preparation. Start planning today to transform fear into confidence.