The key to knee-safe cycling isn’t the brand on your pedal, but mastering the physics of the foot-pedal interface.
- Cleat position dictates leverage, float manages rotational stress, and cadence controls joint torque.
- Stiffness from a carbon pedal body provides more stability for your knee than the marginal weight savings.
Recommendation: Stop chasing grams and start optimizing your personal biomechanics for a pain-free ride by focusing on these core principles.
That sharp, nagging pain on the top or side of your knee is a frustratingly common story among cyclists. Many riders, in a bid to solve the problem, throw money at it—upgrading to the lightest, most expensive carbon pedals on the market, only to find the pain persists, or even worsens. The internet is full of advice, often boiling down to « get more float » or the ubiquitous « get a professional bike fit. » While not incorrect, this advice often misses the fundamental point and fails to empower you with the knowledge to understand *why* your knee hurts.
The truth is, the brand of pedal—be it Look, Shimano, or Speedplay—is secondary. Knee pain is rarely the fault of a single component, but rather a systemic failure in the biomechanics of the foot-pedal interface. The solution lies not in a simple product switch, but in a deeper understanding of the physics at play. This isn’t just about pedals; it’s about the entire kinetic chain, from your saddle to the soles of your shoes.
But what if the key wasn’t simply choosing a brand, but mastering the interplay of leverage, rotation, and force application? What if you could become your own first-line biomechanist, making informed adjustments that protect your joints for years to come? This guide will move beyond brand debates to give you a biomechanist’s perspective on the three pillars of a knee-friendly pedal setup: cleat position, pedal float, and pedaling cadence. By understanding these principles, you can transform your ride from a source of pain into a seamless extension of your body.
This article breaks down the complex biomechanics of the foot-pedal interface into actionable principles. You will learn to look at your setup not as a collection of parts, but as an integrated system designed to protect your joints and maximize your power.
Summary: The Biomechanist’s Framework for a Pain-Free Pedal Stroke
- The Ball of the Foot Myth: Where Should Your Cleats Really Be Positioned?
- Getting Stuck: How to Adjust Pedal Tension So You Can Unclip in a Panic
- Coffee Shop Walk: Why SPD-SL Cleats Are Dangerous on Tiled Floors
- Is Saving 50g on Carbon Pedals Worth the Extra £100 Cost?
- Fixed vs. Floating Cleats: Why 0-Degree Float Might Destroy Your Cartilage
- Patellar Pressure: How Increasing Cadence Reduces Torque on Your Joints
- Thick vs. Thin Pads: Why More Padding Sometimes Causes More Numbness
- Grinding vs. Spinning: What Is the Ideal Cadence to Save Your Knees?
The Ball of the Foot Myth: Where Should Your Cleats Really Be Positioned?
For decades, the default advice for cleat placement has been to position it directly under the « ball of the foot, » specifically the first metatarsal head. This conventional wisdom is based on the idea of mimicking a running motion, creating a rigid lever for power transfer. However, for many riders, this is the primary source of instability and knee strain. Placing the cleat so far forward effectively lengthens the lever arm of your foot, requiring your calf muscles to work constantly to stabilize your ankle. This can lead to fatigue, « hot spots, » and, crucially, unwanted movement that reverberates up the kinetic chain to your knee.
A more biomechanically sound approach for most cyclists, especially those concerned with joint health and long-distance comfort, is a more rearward cleat position. Moving the cleat back towards the mid-foot shortens the lever arm, reducing the load on your calf muscles and creating a more stable platform. This stability at the foot is paramount for ensuring your knee tracks in a straight, healthy plane. As a general rule, a more rearward position is safer and more efficient for endurance riding. You are not a sprinter launching a 1500-watt attack, so you don’t need that maximal forward leverage.
This isn’t just theory; it’s backed by data. It’s important to understand that even small adjustments can have a major impact. For instance, research published in Sports Biomechanics demonstrates that even a 15mm shift in cleat position can cause significant changes in hip, knee, and ankle joint angles, all without any decrease in power output. This highlights how critical precise adjustment is for joint health.
As you can see in the detailed mechanics of the cleat interface, there is significant room for fore-aft adjustment. Don’t be afraid to experiment by moving your cleats back by 3-5mm at a time. The goal is to find a position where your foot feels stable and supported throughout the entire pedal stroke, without any need to consciously « point your toes » or strain your calves. This foundational stability is the first and most important step in building a knee-saving pedal system.
Getting Stuck: How to Adjust Pedal Tension So You Can Unclip in a Panic
The fear of not being able to unclip at a busy intersection is a rite of passage for every new clipless pedal user. This anxiety can cause you to ride stiffly, anticipating the stop long before it happens. While the immediate instinct is to blame the pedal’s tension setting, the reality is often more nuanced. More often than not, a « stuck » feeling is caused by friction and grime within the cleat-pedal interface, not an overly tight mechanism.
Every clipless pedal system (Look, Shimano, and Speedplay) has a release tension adjustment, typically a small hex screw on the rear of the pedal body. Turning it towards the « – » (minus) symbol makes it easier to unclip, while turning it towards the « + » (plus) symbol makes it harder, providing a more « locked-in » feel. For any rider, but especially a beginner or someone recovering from an injury, the starting point should always be the loosest possible setting. You can gradually increase the tension click by click if you experience unwanted release while pulling up on the pedals, but security should never come at the cost of safety.
However, simply loosening the screw is only half the battle. A smooth, predictable release is a function of a clean and well-maintained system. Dirt, road grit, and cleat wear are the primary culprits behind inconsistent or difficult disengagement. A worn cleat can develop sharp edges that « catch » on the pedal body, while grime can dramatically increase the friction you need to overcome. Therefore, mastering release tension is as much about maintenance as it is about mechanical settings.
Your 5-Point Checklist for a Safe and Smooth Release:
- Clean the cleat and pedal interface thoroughly – dirt and grime increase release tension far more than the mechanism setting itself.
- Apply a light lubricant (like a dry-lube or wax) to the cleat-pedal contact points before each ride to reduce the ‘stiction’ factor.
- Adjust the tension screw starting from the loosest setting and gradually increase only if needed for security.
- Test unclipping while stationary before riding – practice the heel-out motion until it becomes automatic.
- Check for worn cleat corners that can create ‘catch points’ – replace cleats showing uneven wear patterns.
Coffee Shop Walk: Why SPD-SL Cleats Are Dangerous on Tiled Floors
The functionality of a pedal system doesn’t end when you dismount. For many riders, the mid-ride coffee stop is a cherished ritual, but it can also be a moment of high peril. The infamous « penguin walk » of a road cyclist clacking across a polished tile or hardwood floor is not just awkward; it’s genuinely hazardous. The hard plastic of Look Keo and Shimano SPD-SL cleats offers minimal grip on smooth, hard surfaces, turning a simple walk to the counter into a slip-and-slide adventure.
This issue of walkability is a significant differentiator between the major pedal systems and should be a serious consideration for riders who anticipate spending any amount of time off the bike in their cycling shoes. The large, smooth contact patch of road-specific cleats is designed for a stable connection to the pedal, not for traction on the ground. Shimano SPD-SL cleats, in particular, with their hard yellow or red « pontoons, » are notoriously slippery. Look Keo cleats are slightly better if you use the « Grip » versions with rubberized sections, but they still offer a precarious footing.
This is one area where Speedplay systems have historically held an advantage, especially with their newer « walkable » cleat covers that provide a large, rubberized surface for traction and protect the cleat mechanism from dirt and wear. While it adds a bit of bulk, the confidence it provides when walking is a significant quality-of-life improvement. The following table provides a clear comparison of how these systems stack up in terms of walkability and other key metrics.
This table, based on extensive testing and user feedback, highlights the trade-offs inherent in each design. The data, detailed in a comparative analysis from cycling experts, shows a clear inverse relationship between on-bike platform size and off-bike walkability.
| Pedal System | Cleat Walkability | Weight (per pair) | Platform Size | Durability Rating | Float Options |
|---|---|---|---|---|---|
| Look Keo | Poor – narrow contact area | 140g per pedal (280g pair) | Medium | High with proper maintenance | 0°, 4.5°, 9° (cleat-dependent) |
| Shimano SPD-SL | Poor – slippery on smooth surfaces | 117g per pedal (234g pair) | Wide – 13.7mm stack height | Excellent – sealed bearings | 0°, 2°, 6° (cleat-dependent) |
| Speedplay | Moderate with walkable cleat version | 117g per pedal (varies by model) | Small – as low as 8.5mm stack | Good – requires regular maintenance | 0-15° adjustable on cleat |
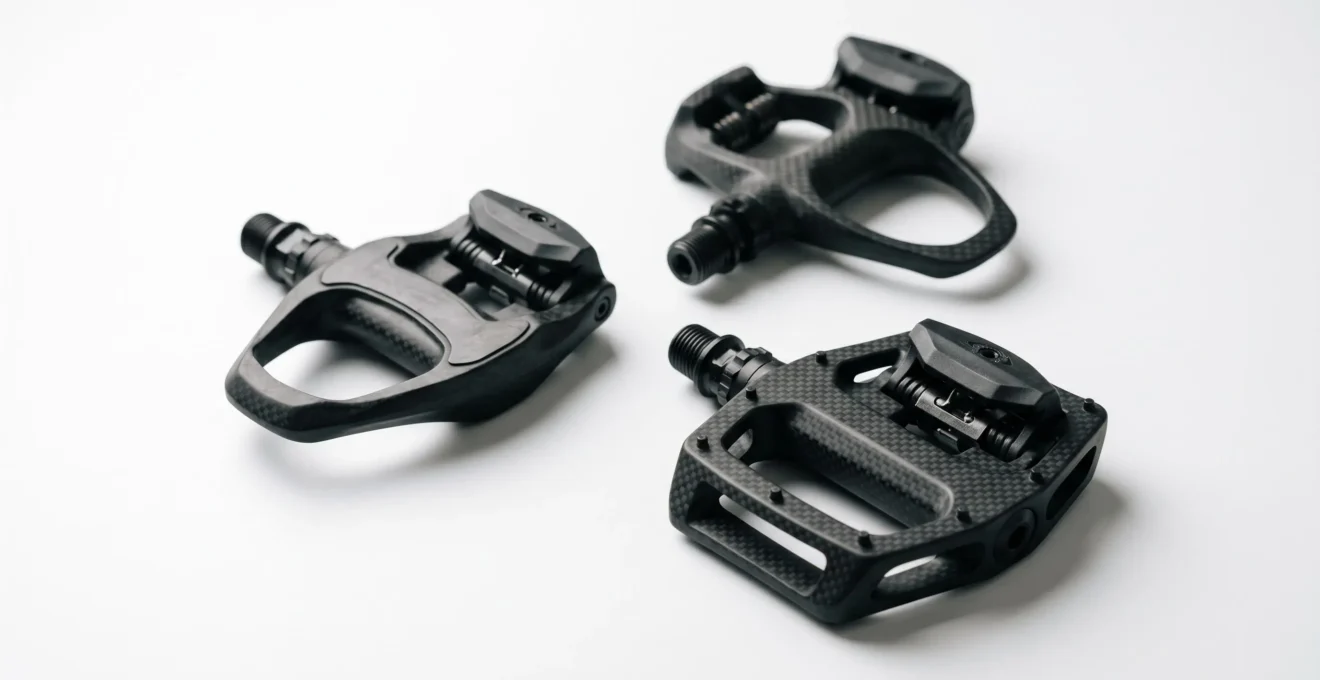
Is Saving 50g on Carbon Pedals Worth the Extra £100 Cost?
The allure of carbon fiber is strong in the cycling world. Marketers love to tout the weight savings of carbon components, and pedals are no exception. It’s common to see a £100 or more price difference between a composite pedal and its lighter carbon counterpart, often for a weight saving of just 50-60 grams per pair. For a rider concerned about knee health, the question is stark: is this marginal weight reduction worth the significant cost? From a biomechanical perspective, the answer is no. The weight savings are irrelevant to joint health.
However, the real benefit of high-end carbon pedals is not their lower weight, but their increased stiffness. This is the critical factor for knee stability that is often overlooked. Cheaper composite pedal bodies can exhibit tiny amounts of « micro-flex » under the high torque of a powerful pedal stroke. This subtle bending of the pedal platform means your foot’s position can shift fractionally mid-stroke, causing your knee to deviate from its ideal tracking plane. Over thousands of repetitions, this torsional stress can lead to inflammation and pain.
A carbon-composite pedal body is significantly more rigid, resisting this flex and providing a completely stable, unyielding platform. This ensures that every watt of power goes into forward motion and, more importantly, that your foot and knee remain perfectly aligned, even during intense, out-of-the-saddle efforts. As Shimano’s technical documentation notes, it’s not just the material but the design it enables; for example, « The wide-bearing placement provides a more stable, uniform distribution of load, which can be beneficial for climbing or high-wattage situations. » This stability is the true, knee-saving benefit you’re paying for.
Case Study: The Role of Stiffness in Knee Stability
High-end carbon pedal systems like the Look Keo Blade Carbon Titanium Ceramic (220g per pair) and Shimano Dura-Ace PD-R9100 (228g) utilize carbon-composite construction not just for weight savings, but for increased lateral stiffness. This stiffness reduces micro-flexing under high-torque pedaling, creating a more stable platform that prevents torsional stress on the knee joint. The extra rigidity becomes particularly relevant during out-of-saddle efforts and sprint intervals where pedal flex in cheaper composite bodies can cause the foot to shift position mid-stroke, leading to knee tracking instability.
Fixed vs. Floating Cleats: Why 0-Degree Float Might Destroy Your Cartilage
Of all the factors in the foot-pedal interface, none is more critical—or more misunderstood—for knee health than « float. » Float is the small amount of rotational freedom, measured in degrees, that allows your foot to pivot slightly from side to side while clipped in. This movement is not a sign of a loose connection; it is a vital safety feature that allows your knee to follow its natural biomechanical path throughout the pedal stroke.
Using a fixed, 0-degree float cleat (like Shimano’s red SPD-SL or Look’s black Keo cleats) is akin to setting your knee in concrete. It locks your foot into a single, unchangeable angle. If that angle is not absolutely, 100% perfectly aligned with your unique hip-knee-ankle anatomy, your knee joint will be forced to absorb all the rotational stress. As a professional bike fitting analysis from Wahoo Fitness succinctly puts it, « The knee is a hinge joint and can not tolerate much rotation. There needs to be a tolerance for this motion. » Forcing the knee to twist against a fixed foot is a direct path to cartilage damage and chronic pain.
This is why, for the vast majority of riders, cleats with some degree of float are non-negotiable. Look (grey, 4.5°) and Shimano (yellow, 6°) offer self-centering float, where light spring tension gently guides your foot back to the center. Speedplay offers up to 15° of non-centering or « free » float, allowing your foot to find its own natural position without resistance. The amount needed is individual, but studies to date have shown that allowing even a few degrees of axial rotation in clipless pedals can significantly reduce the potential for stress injuries to the knees.
The only time a 0-degree float cleat should be considered is under the direct supervision of an expert fitter, after a comprehensive biomechanical analysis confirms your tracking is perfectly neutral. For everyone else, embracing float is the single most important decision you can make for the long-term health of your knees. It provides the necessary « give » in the system, preventing harmful torsional forces from reaching your joints.
Patellar Pressure: How Increasing Cadence Reduces Torque on Your Joints
Beyond the hardware of your pedal system, *how* you pedal is a massive factor in knee health. The debate between « grinding » (pushing a big gear at a low cadence) and « spinning » (using an easier gear at a high cadence) is not just a matter of style; it’s a matter of physics and joint load. Pushing a heavy gear at 60 RPM generates immense peak forces on your knee with every single pedal stroke. This high-torque, low-velocity approach places enormous compressive force on the patella (kneecap).
Think of it like lifting weights. Grinding is like doing a single, maximal-effort squat. Spinning is like doing a set of 15 lighter squats. While both might accomplish the same total work, the stress profile on your joints is drastically different. By increasing your cadence to the 85-95 RPM range, you reduce the force required for each individual pedal stroke. This lowers the peak torque transmitted through your leg and, consequently, reduces the pressure on your patellar cartilage.
This isn’t just anecdotal wisdom passed down through generations of cyclists; it’s confirmed by scientific measurement. In a controlled setting, biomechanical research confirms that a greater pedaling cadence resulted in reduced patellofemoral compressive force. The study found this benefit occurred without any negative effect on other joint forces, making it a clear win for knee health. Shifting to a higher cadence is a free, immediate, and profoundly effective way to be kinder to your knees.
Learning to spin smoothly takes practice. It often feels unnatural at first, like your legs are running away from you. The key is to focus on making perfect, fluid circles rather than just mashing down on the pedals. Use a cadence sensor and focus on keeping your number in that target range, even if it means shifting to an easier gear than your ego wants. Your knees will thank you for it in the long run.
Thick vs. Thin Pads: Why More Padding Sometimes Causes More Numbness
While much of our focus is on the foot-pedal interface, the principle of pressure management extends throughout the kinetic chain, most notably to the saddle. Many riders experiencing discomfort or numbness intuitively believe that more padding is the solution. They might choose cycling shorts with the thickest chamois available, hoping to cushion themselves into comfort. However, this often backfires, creating more problems than it solves.
The issue lies not in the amount of padding, but in its density and placement. Your primary support on the saddle should come from your ischial tuberosities, or « sit bones. » A good chamois is designed with high-density foam strategically placed under these two points. Numbness and pain, particularly in the perineal area, occur when excessive pressure is placed on the soft tissues and nerves that run between the sit bones. An overly thick or low-density pad can act like a hammock, failing to provide firm support for the sit bones and instead creating a large, uniform pressure zone that compresses these sensitive areas.
Furthermore, a very thick pad can act like a sponge, absorbing moisture and increasing the risk of chafing. It can also create an unstable connection to the saddle, allowing for subtle shifting and rubbing that leads to irritation over a long ride. A high-quality, thinner pad with multi-density foam, on the other hand, provides support exactly where it’s needed—under the bones—while leaving the soft tissue areas with minimal pressure. The goal is not to sit *on* a pillow, but to have your skeletal structure supported in a way that relieves pressure on your nerves and arteries.
Therefore, when choosing cycling shorts, look for a chamois that is described as « multi-density » and feels firm to the touch in key areas, rather than one that is simply uniformly thick and soft. The best solution is often less padding, but smarter padding. This ensures blood flow is maintained and nerve compression is minimized, which is the true key to long-distance comfort and preventing numbness.
Key takeaways
- Cleat position is about creating a stable lever for your foot; for most riders, a more rearward position is safer and more efficient than the traditional « ball of the foot » placement.
- Pedal float is a non-negotiable safety feature that allows your knee to track naturally, preventing harmful torsional stress on your cartilage. 0-degree float is only for the perfectly-aligned few.
- Higher cadence (« spinning » around 85-95 RPM) dramatically reduces the peak torque and compressive forces on your knee joints compared to « grinding » in a big gear.
Grinding vs. Spinning: What Is the Ideal Cadence to Save Your Knees?
The persistent nature of cycling-related knee pain is a problem that affects riders at all levels, even at the pinnacle of the sport. It’s not just a beginner’s issue. In fact, a study published in The American Journal of Sports Medicine found that an astonishing 36 percent of 109 professional road cyclists experienced anterior knee pain in the previous twelve months. If the pros, with access to the best equipment and medical care, are struggling, it underscores the universal importance of sound biomechanics.
A primary contributor to this is the tendency to « grind » a large gear at a low cadence. This style of pedaling feels powerful, but it places maximum stress on the knee at its most vulnerable point. As explained by biomechanics experts, the top of the pedal stroke is where the problem lies. According to Bike Fit Adviser, « At the top of the stroke, the knee is flexed maximally in the pedal cycle, which stretches the quadricep muscle, quadricep tendon, patellar tendon and increases compressive forces on the patella and sub-patellar cartilage. » Mashing down on a big gear from this position is like applying a crowbar to your kneecap, over and over.
The antidote is to consciously cultivate a « spinning » technique. By choosing an easier gear and increasing your cadence into the 85-95 RPM range, you fundamentally change the force profile. The total power output might be the same, but the peak load on your patellofemoral joint during any given revolution is significantly lower. This smoother application of power is the single most effective behavioral change a cyclist can make to protect their knees. It transforms the pedal stroke from a series of high-impact punches into a continuous, low-impact flow.
Ultimately, the « best » pedal is not a brand name, but a system that you have tuned to your unique body. By mastering cleat position, embracing float, understanding the value of stiffness, and cultivating a smooth, high-cadence pedal stroke, you are taking direct control over your joint health. Stop searching for a magic bullet product and start becoming an expert on your own biomechanics. Audit your foot-pedal interface with these principles in mind and build a setup that will carry you through countless pain-free miles.